Last week, I posted about Finn’s 2nd birthday. His big surprise was a homemade train table, which I was beyond excited to give him. I’m not generally a crafter. I mean, I love to create–I write, I take photos, I cook. But, as much as I love spending hours roaming the aisles at craft stores, imagining what I could do with feathers and wooden cut-outs and puffy paint, craft projects aren’t really in my wheelhouse. I just don’t have the patience for them.
Yet, when we decided pretty early on that we wanted to give Finn a train table for his birthday, I became adamant that I wanted to make it for him myself. There were a few reasons why I wanted to take the (relatively easy) project on: 1. After looking at all of the well-rated train tables available on the market, I was totally put off by how ugly they were. I know this sounds so petty, but we love our little home, take pride in how it looks, and are pretty design-conscious. So, having some factory-issued, laminate play table right in the center of our family room was really unappealing. 2. The marketed ones were also really large and bulky, and the space we had in mind for the table required one that was much more streamlined. 3. I wanted it to have some sentimental value. I knew Finn wouldn’t care whether he had a gleaming store-bought version or a hacked Momma-made table. So, I opted for the latter.
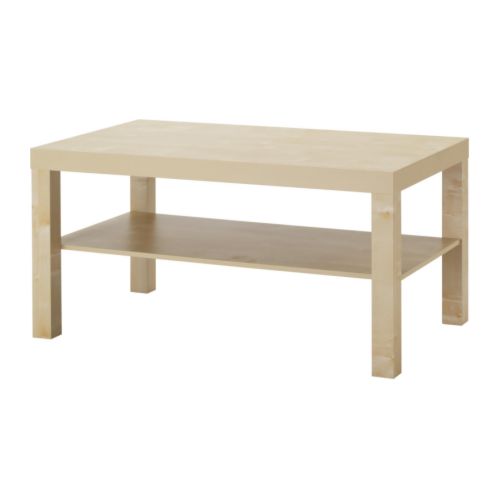
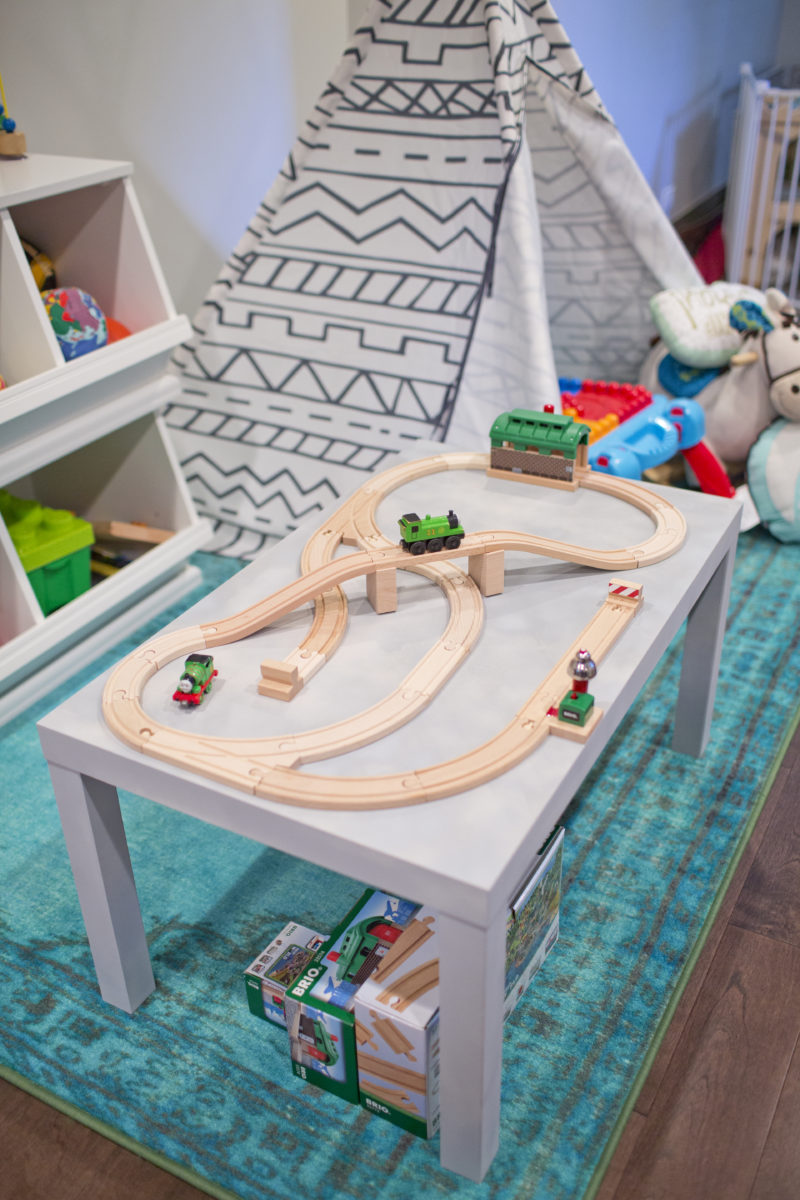
Since I’m about as experienced at building furniture as I am at running marathons–which is to say, not at all–I knew I needed to start with a solid base. Of course, IKEA came through for me! I found the LACK coffee table online, and I’d seen it hacked for several different projects. It was the right size, was only $24.99, and was a great blank slate. So, I drove out to the ‘burbs and picked one up. (Note: this coffee table comes in two sizes. We got the smaller of the two.)
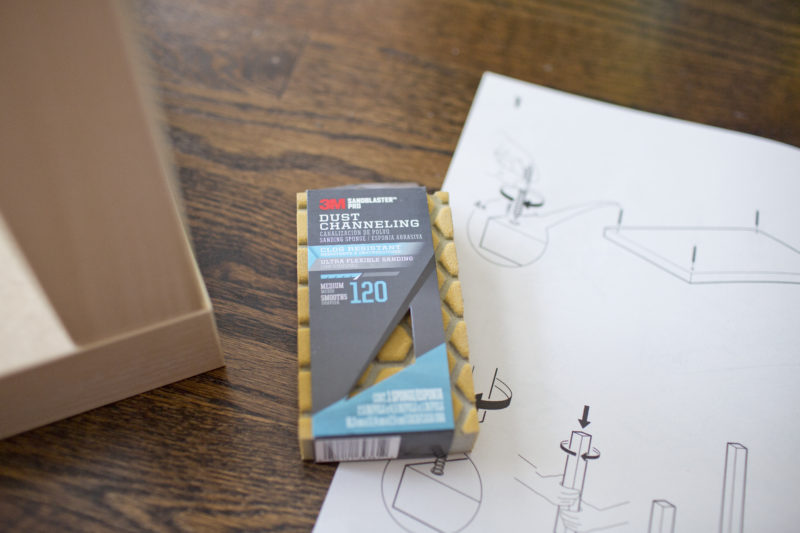
Luckily, unlike most IKEA furniture, the table was pretty easy to put together. I started by screwing together everything except for the shelf, as I figured it’d be easier to paint it all without the shelf attached.
First, I had to sand the heck out of the thing. Again, like most stuff from IKEA, the table isn’t solid wood. It’s MDF, covered in laminate, and the surface wouldn’t have been receptive to paint had I not sanded it quite a bit.
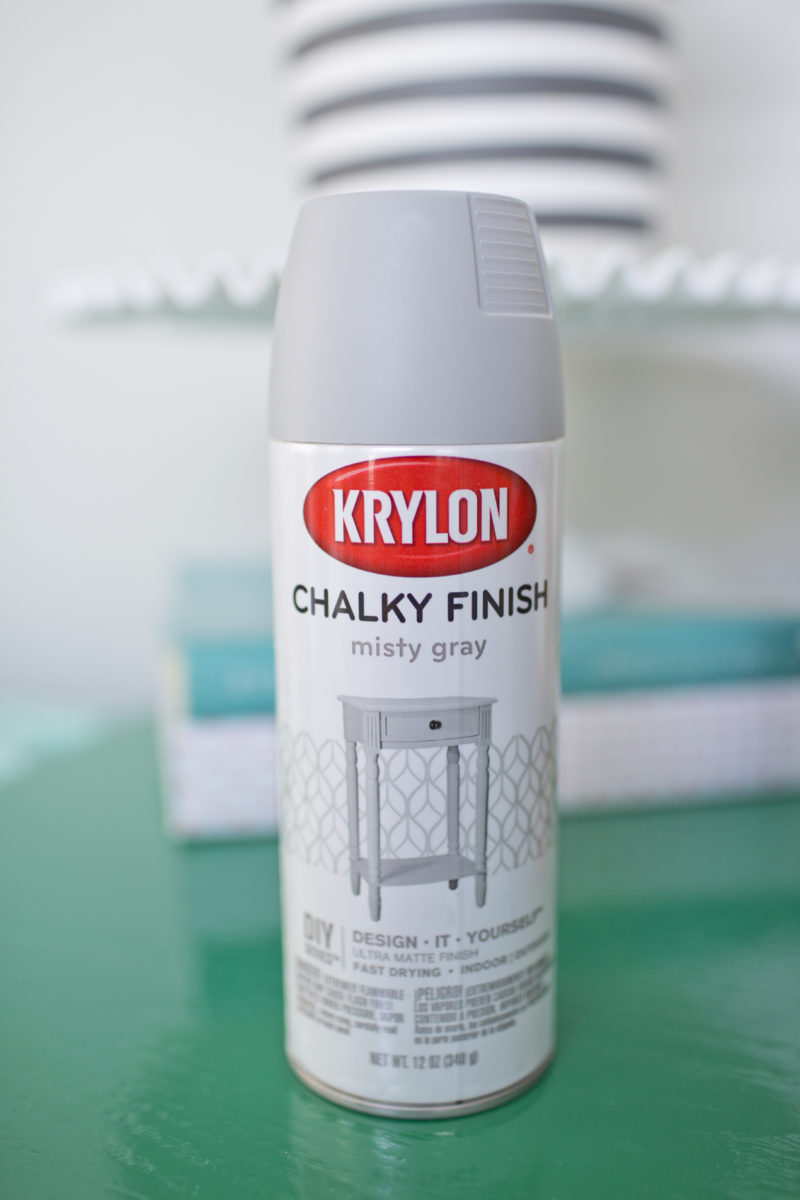
I chose to go with a spray chalk paint. If I did this project again, I’d either go with a brushable chalk paint or a more forgiving spray paint. I think I’d get a smoother surface that way.
I did start with a spray primer. Again, I wish I would’ve bought something that could’ve been applied with a brush. You live and you learn. Still, a primer that is specifically intended for laminate surfaces is absolutely necessary.
After two coats of primer, I spent a few days applying several thin coats of the chalk paint. This is the one I chose, though. It took three cans and a few days to finish this step. Impatient Me struggled with that wait time a bit.
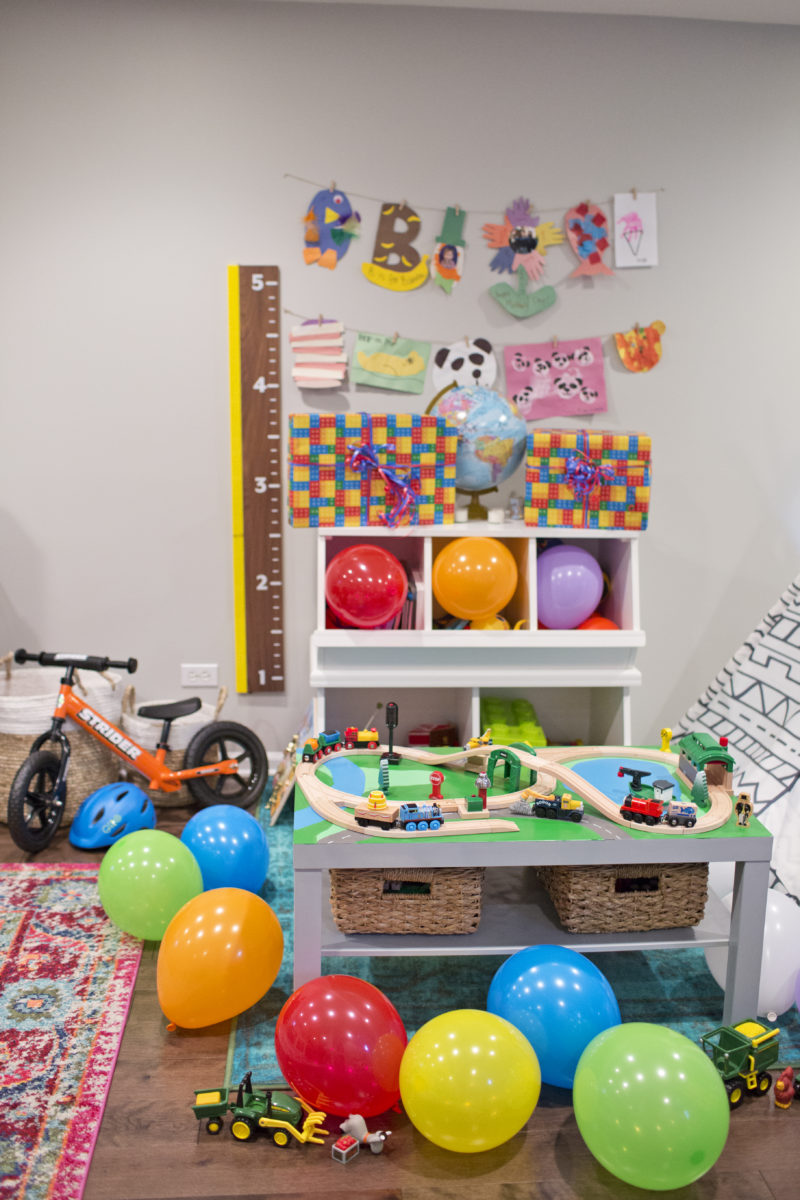
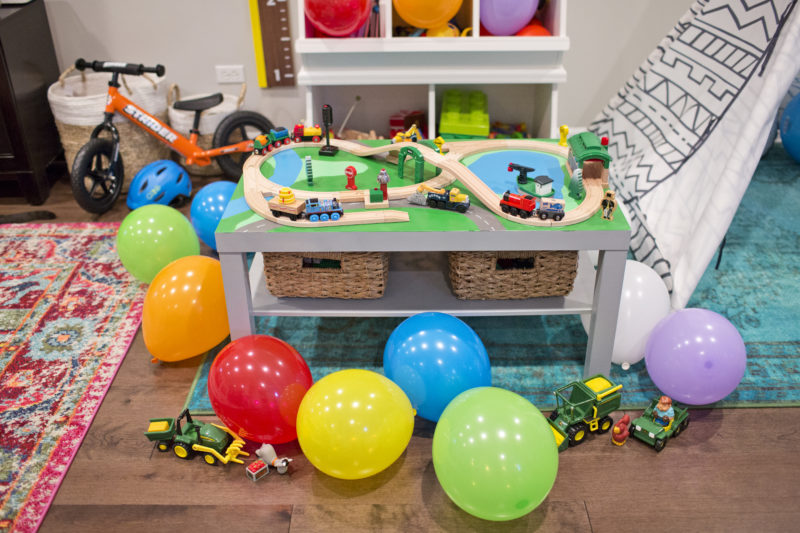
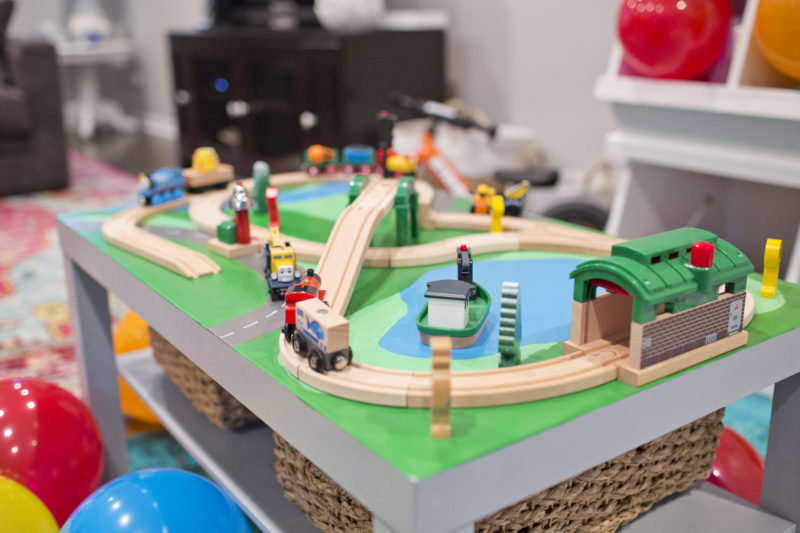
The next step was to figure out the layout for the tracks and map out how I’d paint the landscape on top. One of the other reasons we wanted to make a relatively inexpensive table is so that we could instead invest in high-quality tracks and accessories. We went with BRIO, which really is the best, and I had a little too much fun figuring out which accessories to order and which configurations would maximize the table space. I also sourced a few things for cheap on eBay–like the trees and signs, which are really difficult to find without having to purchase a full set.
Sona and I spent an hour one evening laying the tracks out, and then I made the biggest error–a rookie error–in the project: I outlined it all in pen. I couldn’t find a pencil and was being lazy. “I’ll just paint over it, anyway, I thought.”
Important Fact of the Day: most pens use oil-based ink. Paint cannot cover oil. No matter how many coats of paint–and, eventually, more primer–you put over pen marks, they will still show through.
This little mishap cost me a new can of oil-specific primer, a couple of extra days worth of painting, and a few tears. For what it’s worth, I’ve read that pencil lines can have the same effect. So, choose a paint-friendly pencil to outline.
Anyway, I did eventually get it worked out, and I painted the table using four colors of acrylic craft paint: green, light green, blue, and grey. I also used a Sharpie paint pen for the dashes on the roadways.
We made the decision not to glue/nail down the tracks, as we have lots more and want Finn to be able to change it up as time goes on. We’ve already shifted things around a bit, actually. Even still, the painted landscape is really what makes the table feel special, and it was the part I had the most fun doing.
After the landscape dried, I did three coats of polyacrylic sealer on the whole table, screwed on the bottom shelf, and added a couple of baskets–one with extra tracks and one with trains. (If you follow us on Insta, you know that I hit the jackpot, scoring around 60 high-quality trains for like $50 in an online sale. Now that I know the trains run $15-$25 each, I realize how lucky we got.)
Also, in the category of “things I never would have known before having kids,” BRIO tracks are compatible with most trains, including the larger, wooden Thomas the Train ones. The only trains that don’t work are the smaller, metal die-cast Thomas trains, which only work with Thomas tracks.
Here is the resulting table:
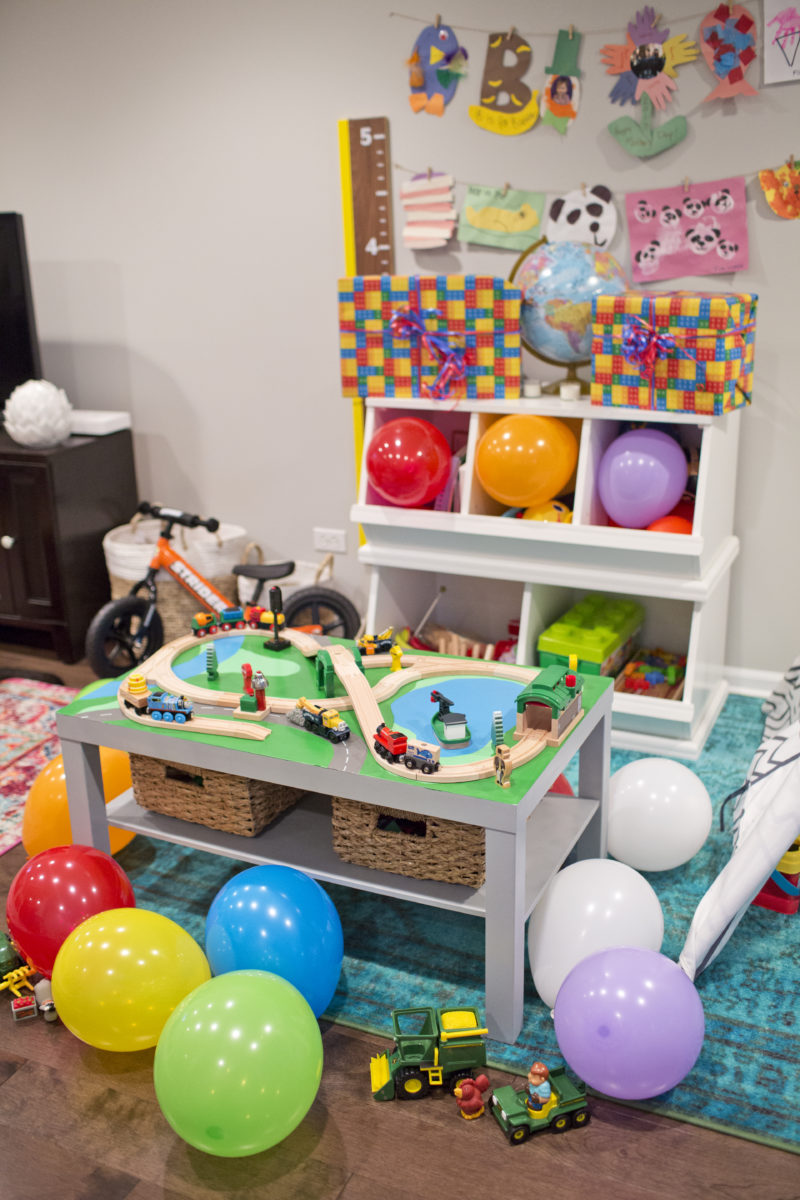
Of course, it isn’t perfect. You can still KINDA see a few pen marks on top, I could’ve put an extra coat of paint on the bottom shelf, and the edges of the landscape are a little uneven, but Finn LOVES it. He has literally played with it every single day since we gave it to him, and he doesn’t really care about the imperfections, which is really all that matters.
How much did it end up costing for just the table, anyway?
LACK coffee table: $25
3 cans of chalk spray paint: $18
primer: $6
brushes and acrylic paint: $12
polyacrylic sealer: $10
baskets: $12/each
TOTAL: $95
(The tracks and accessories were purchased separately. If you’re interested in exactly which BRIO sets we got, just let me know.)